
Magic or accelerators?
I’m sure by now you have already heard someone saying that low-code development, and particularly OutSystems, is just about dragging and dropping circles.

Although this comment is usually said condescendingly, the truth is they’re not far off from reality. Don’t get me wrong, OutSystems is so much more than that, and you can build highly complex, enterprise-grade, business-responsive full-fledged solutions. But the magic behind OutSystems’ modern application development platform allows, with just a few mouse moves and clicks, to create a simple app with lists, editable screens, and even navigation menus.
Like a magician waving his magic wand, you can use your mouse to drag-and-drop elements on the OutSystems Service Studio – OutSystems visual development environment -, and just as a magic trick, create a first app.
What is behind this magic trick?
Well, OutSystems calls it accelerators.
Throughout this article, we will show you in a few simple steps how to create your database entities with a single Excel file, how to add a List Screen, and a Form-editable screen to view and manipulate your data.
Before we start exploring these accelerators, make sure to check the note below.
Quick-note:
The examples in this article were developed in an OutSystems Web Reactive application, using the Service Studio version 11.8.12. If you would like to know more about the OutSystems platform and Service Studio development environment, please follow the links:
Bootstrap data
Do you want to create an entity and upload sample data to it during design time? OutSystems has a process that helps you to upload an Excel File to create your Entities, called Bootstrap.
How can you bootstrap an Entity in an OutSystems app?
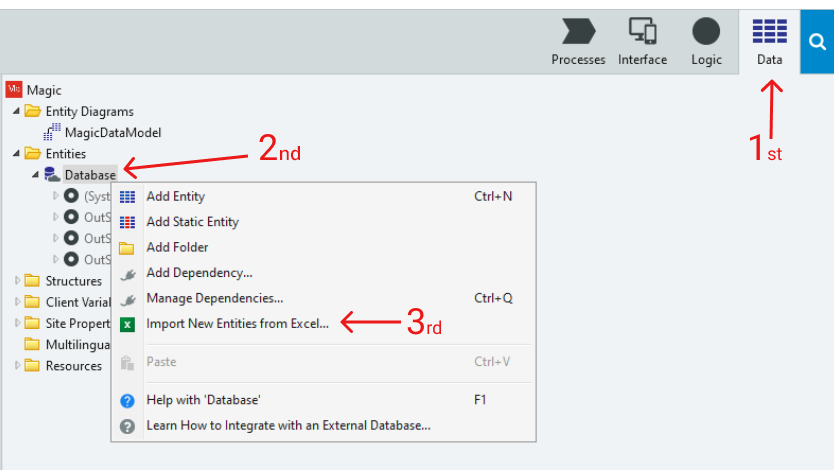
⦁ Go to the Data tab, right-click on the Database icon, and choose ‘Import New Entities from an Excel…’.
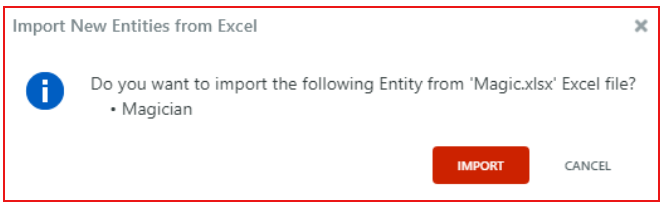
⦁ Select the Excel file and click on Proceed.

The magic
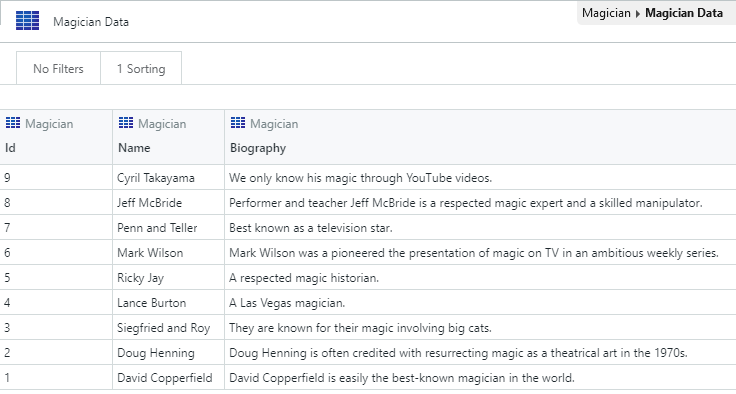
The Service Studio will create the entity for you, based on your Excel file, where:
⦁ The name of the Entity is the name of the Excel sheet;
⦁ The name of each attribute is based on each column of the first row of your Excel file.
⦁ The data type of each attribute is based on the name of the columns and also, in the case that your Excel file contains data, the validation of the data that is inside each column.
Besides the entity, the Service Studio, adds as well:
⦁ An action with the bootstrap logic named “Bootstrap” in the Logic tab.
⦁ A structure with the content of the Excel file named “Excel_” in the Data tab.
⦁ A resource with the Excel file in the Resources folder in the Data tab.
⦁ A timer to execute the action named “Bootstrap” in the Processes tab.
⦁ Database actions to fetch and manipulate data, like UpdateMagician.
If the Excel file also includes data, once you publish the module, the Service Studio will execute the action to bootstrap the data.
Would you like to know more about this magic?
https://success.outsystems.com/Documentation/11/Developing_an_Application/Use_Data/Bootstrap_an_Entity_Using_an_Excel_File
Create a List and Detail screen
Do you want to create a screen to list your entity records and another one to edit the records? OutSystems has a process that helps you create the List and Detail screens using an existent Entity, called scaffolding.
How can you implement the List Screen in an OutSystems app?
⦁ Open the MainFlow Interface tab.

⦁ Go to the Data tab, and drag and drop your entity inside the MainFlow, then enjoy the magic show.

If your application is a Web Traditional app, you need to drag and drop the Entity to the MainFlow twice.
The magic
Service Studio will create the screens for you, as well as the respective navigation.
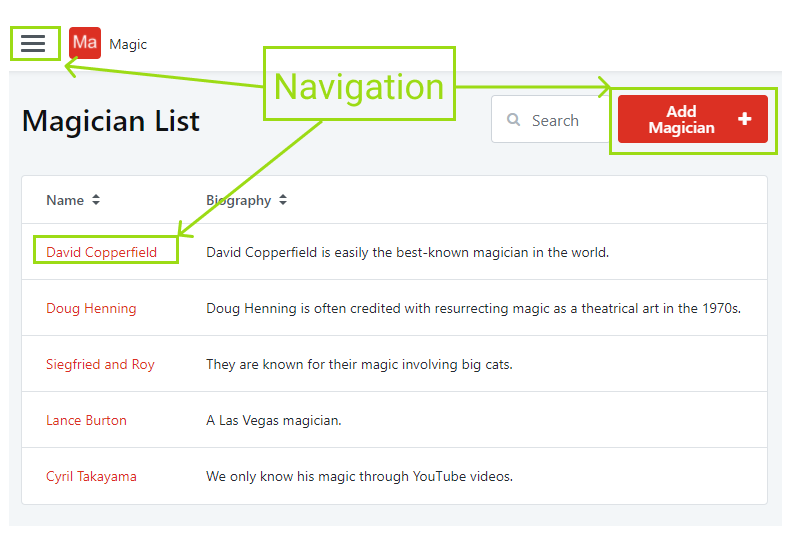
Navigation
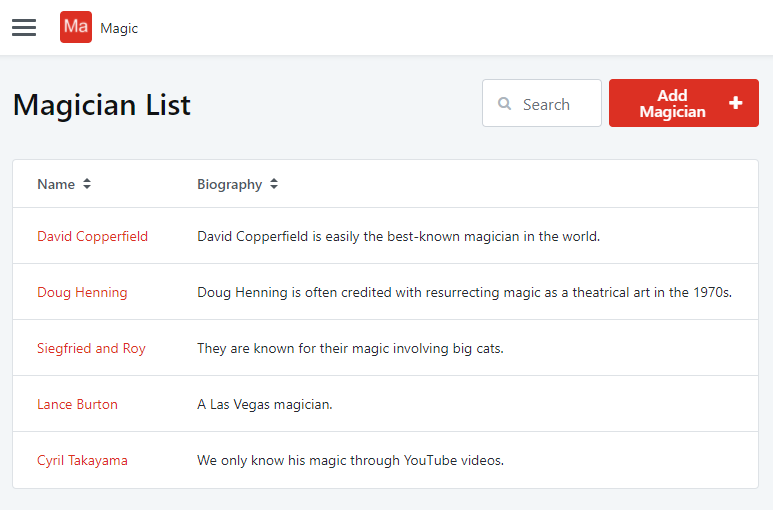
The Menu includes a link to the List screen. Here, there is a link to the Detail screen on each table record to view the record’s details. These details are inside a form, where you can consult the data or even easily edit it.
Also, on the Action placeholder, on the List screen (right corner of the screen, above the table), you will see a button to navigate to the Detail screen, where you can add a new record to the entity.
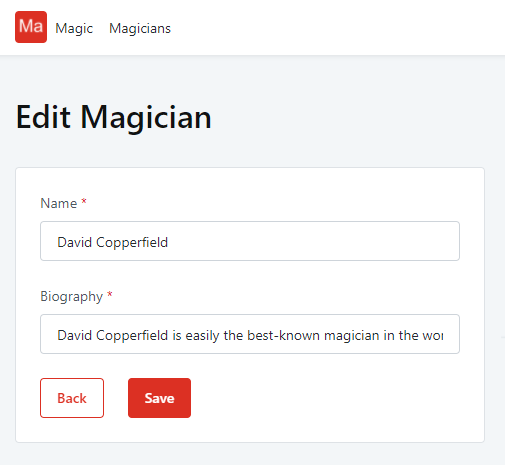
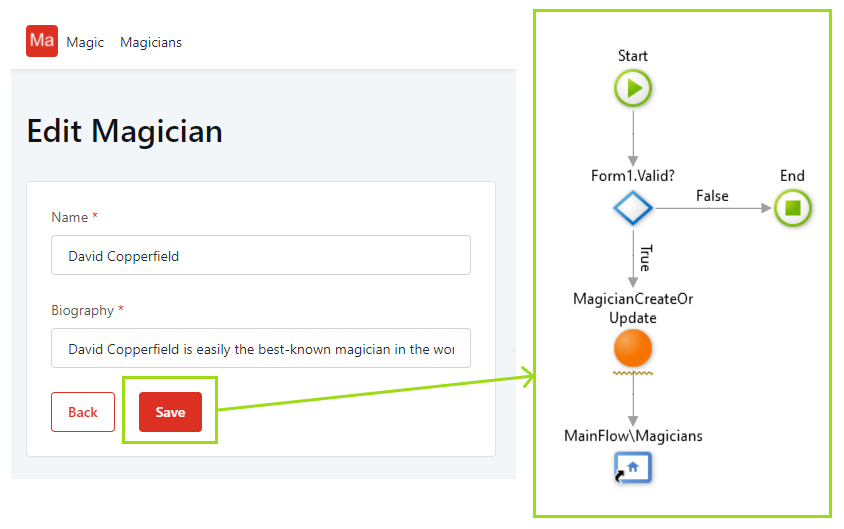
Save or Update Data
Furthermore, on your Detail screen, the accelerator also generated a save action to add new records to the database or update existing ones.
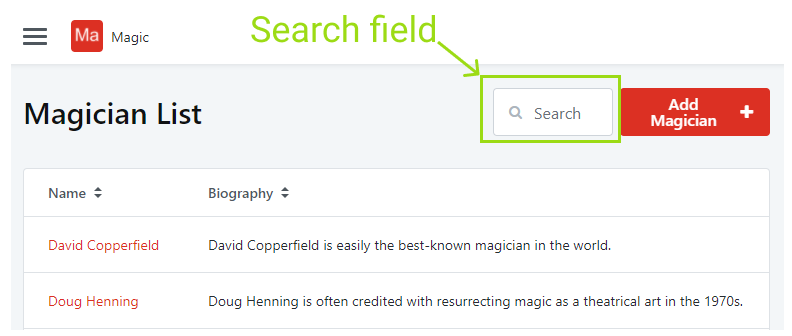
Extra features
Besides the navigation and save records, the List screen will also have a Search input field, allowing the user to filter the table list records by a specific keyword.
Suppose the entity is consumed outside the UI module. In that case, some of these features can be disabled, depending on if your entity is exposed as read-only or is defined to allow the others modules to edit their respective records directly.
Check more information about this topic here.
Would you like to know more about this magic?
https://www.outsystems.com/whats-new/reactive-scaffolding/
What else?
Are you interested in learning more about OutSystems?
If you are interested in learning more OutSystems patterns and consolidate your knowledge about the platform, I recommend the course below:
Core Ramp Up in Reactive
This instructor-led course introduces the OutSystems Reactive fundamental concepts, also offering a Consolidation module of two weeks of hands-on exercises, projects, and presentations.
Extra content links to accelerate your development process
⦁ Service Studio Tips and Tricks
https://success.outsystems.com/Documentation/11/Getting_started/Service_Studio_Tips_and_Tricks
⦁ Service Studio Shortcuts
https://success.outsystems.com/Documentation/11/Developing_an_Application/Service_Studio_Shortcuts
Conclusions
Now that you know the trick behind the OutSystems magic to create entities and screens quickly, join one of our training programs and further your knowledge on the OutSystems platform.
Who knows, maybe you can be the next OutSystems Great Magician actively contributing to our community.


